GCP Configuration Integration - Manual Configuration
To create a Lacework GCP configuration integration manually using the GCP Console and the Lacework Console, follow the procedures below.
GCP Project
When integrating at the Organization level, Lacework recommends that you create a project specifically for Lacework resources.
When integrating at the Project level, all required resources for Lacework may be provisioned within the project being integrated.
The project being used must have billing enabled.
Create a GCP Service Account and Grant Access
Follow the procedure provided in Create a GCP Service Account and Grant Access.
Enable the Required GCP APIs
When manually creating a GCP configuration integration, you must enable APIs for the GCP projects you want to integrate. Follow the procedure provided in Enable the Required GCP APIs.
Navigate to Manual Integration
- Log in to the Lacework Console.
- Go to Settings > Integrations > Cloud accounts.
- Click + Add New.
- Click Google Cloud Platform and select Configuration to assess GCP configuration compliance.
- Click Next.
- Click Manual Configuration and follow the steps in Create a GCP Configuration Integration.
Create a GCP Configuration Integration
- Create a GCP service account and grant access.
- Enable the required GCP APIs.
- For Name, enter a unique name that displays in the Lacework Console.
- Follow the steps to either upload GCP credentials or enter information manually.
When creating the GCP integration, you can either upload GCP credentials or enter all information manually. Finish creating the integration in the Lacework Console by following the steps described in one of the following sections.
Upload GCP Credentials
To upload GCP credentials, follow these steps:
For Upload GCP Credential, click Choose File and navigate to the JSON key file downloaded when you created the GCP service account.
This populates the credential fields.For Integration Level, select Organization or Project. Select Organization if integrating at the organization level. Select Project if integrating at the project level.
For Org/Project ID, paste in the appropriate ID value for your integration type:
If integrating at the project level, copy and paste the value of the project_id property from the JSON file.
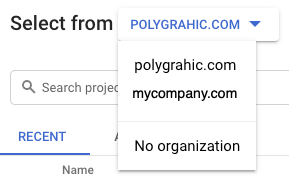
If integrating at the organization level, log in to the GCP console. Click the down arrow in the top menu bar. From the Select from the drop-down, select an organization that contains the GCP project(s) that you want the integration to monitor. Select IAM & admin > Settings and copy and paste the number from the Organization ID field.
Click Save to finish the GCP integration and save your onboarding progress. The integration appears in the list of cloud accounts under Cloud accounts.
For the “Integration Pending” status, hover over the status text and click the refresh icon to fetch the status result again. This does not retest the integration.
Enter Information Manually
Entering information manually requires a system with the jq utility installed. The jq utility is a flexible command-line JSON processor. For more information, see https://stedolan.github.io/jq/.
To manually enter GCP credentials, follow these steps:
Verify that the jq (command-line JSON processor) utility is available from your command-line shell. Leave this command-line window open.
jqIf the jq utility is found, skip to the next step. If the jq utility is not installed or not listed in your PATH, install it (https://stedolan.github.io/jq/ and verify that the path to the utility is listed in your PATH environment variable. The jq utility is required for some steps in the following procedure.
Locate the JSON key file downloaded when you created the GCP service account.
Open the file in an editor and leave it open.
Copy the value of the client_id property from the JSON file and paste the value into the Client ID field of the Lacework Console.
Copy the value of the private_key_id property from the JSON file and paste the value into the Private Key ID field of the Lacework Console.
Copy the value of the client_email property from the JSON file and paste the value into the Client Email field of the Lacework Console.
Exit the editor.
You cannot just copy the private key from the editor because of an issue with copying the new line characters. You must copy a raw version of the key using the “jq” utility as described in the following steps.
To view the raw text of the private key, enter the following command, where YourFileName.json is the name of the file downloaded when you created the GCP Service Account.
cat YourFileName.json | jq -r '.private_key'Copy all text displayed in the output including the Begin and End lines.
-----BEGIN PRIVATE KEY-----
YourKeyInfo
-----END PRIVATE KEY-----
Paste the text into the Private Key field of the Lacework Console.
For Integration Level, select Organization or Project. Select Organization if integrating at the organization level. Select Project if integrating at the project level.
For Org/Project ID, paste in the appropriate ID value for your integration type:
If integrating at the project level, copy and paste the value of the project_id property from the JSON file.
If integrating at the organization level, log in to the GCP console. Click the down arrow in the top menu bar. From the Select from the drop-down, select an organization that contains the GCP project(s) that you want the integration to monitor. Select IAM & admin > Settings and copy and paste the number from the Organization ID field.
Click Save to finish the GCP integration and save your onboarding progress. The integration appears in the list of cloud accounts under Cloud accounts.
For the “Integration Pending” status, hover over the status text and click the refresh icon to fetch the status result again. This does not retest the integration.