Configure SAML SSO with Red Hat Keycloak
This document contains procedures to configure SAML SSO with Red Hat Keycloak and allow it to facilitate employee access to your Lacework Console.
note
This configuration requires an admin rights for your realm, and admin rights in your Lacework account or organization.
Create the Lacework Client in Keycloak
In your Keycloak account, complete the following steps:
Sign in to Keycloak with administrative privileges.
Go to the Keycloak administration console and select your realm.
Go to Clients and click on create (top left).
In the new Client wizard, add the following settings:
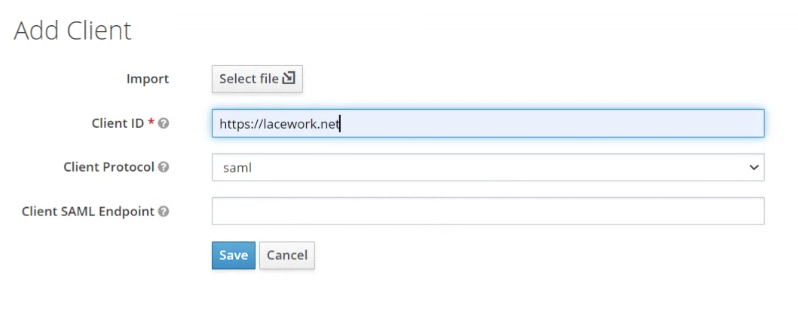
- Client ID :
https://lacework.net - Client Protocol :
saml - Click Save.
- Client ID :
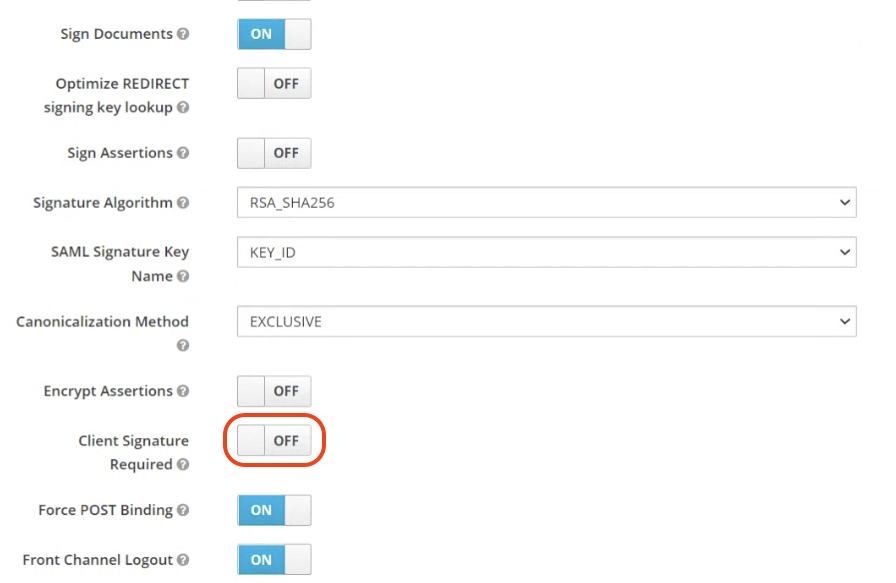
Go to the newly created Client and apply the following settings:
Client Signature Required : OFF
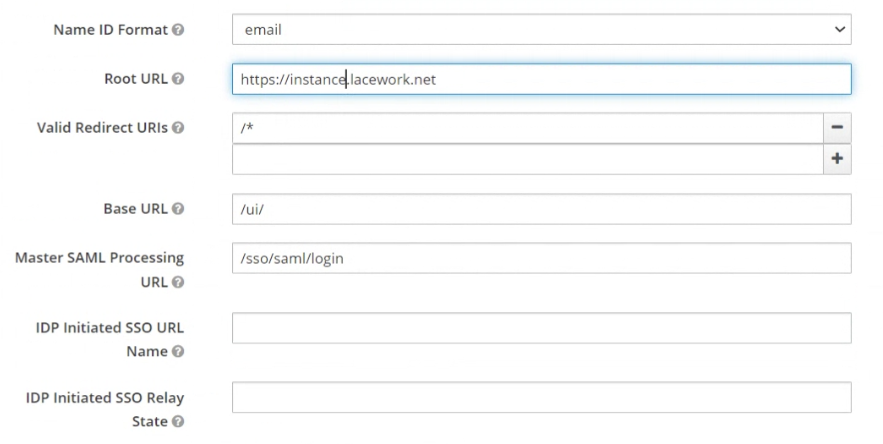
Name ID Format :
emailRoot URL : Your Tenant Name in the form https://tenant.lacework.net
Valid Redirect URIs :
/*Base URL :
/ui/Master SAML Processing URL :
/sso/saml/login
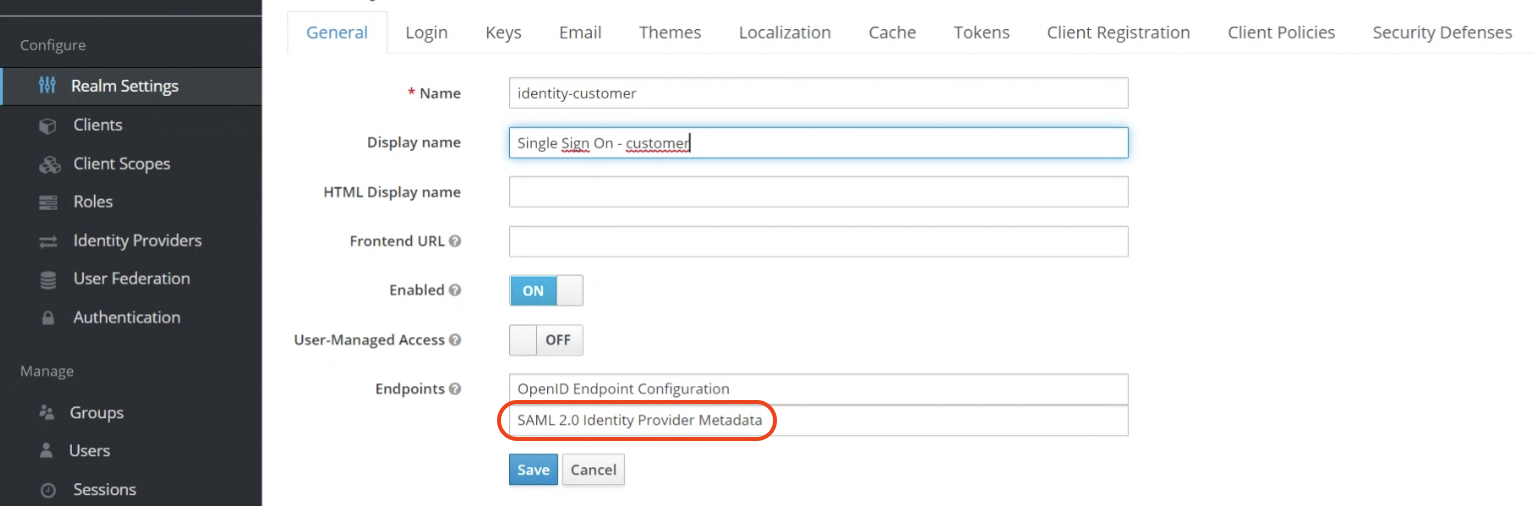
Go to your realm settings in General and download the Keycloak Identity Provider Metadata for SAML 2.0.
Enable SAML in the Lacework Console
Sign in to the Lacework Console with an admin account and navigate to Settings > Authentication > SAML.
- Select Upload identity provider data and click Next.
- Type a descriptive name for Identity Provider.
- In Upload Identity Provider Meta Data File, click Choose File and select the previously saved Keycloak metadata file.
The fields should be populated and you should see confirmation that the metadata included a certificate. - Click Save.